A kitchen that looks spacious on a drawing can become difficult to use once cabinet doors, appliance handles, people and uneven walls occupy the same space. By surveying your Pimple Saudagar flat, selecting a layout around real movement and specifying materials and hardware by performance, you can create kitchen furniture and a modular unit that remain practical after installation.
Key takeaways
- Measure finished walls, flooring, windows, shafts, pipes and appliance points before ordering cabinets.
- Keep at least 900 millimetres between opposing kitchen counters for comfortable movement.
- Match drawers, pull-outs and corner storage to your cooking sequence and daily reach.
- Choose materials by moisture resistance, edge sealing, hardware quality and repairability—not gloss alone.
What should you measure in a Pimple Saudagar flat before designing the kitchen?
Start with a scaled site brief, not a cabinet catalogue: accurate kitchen measurement prevents a modular unit from colliding with a window, service shaft or pipe. In a Pimple Saudagar flat, measure the finished room after flooring and wall tiles, then record every constraint before choosing cabinets or a layout.
- Measure every wall length in millimetres, including the distance between corners, and check each wall in at least two places for unevenness.
- Record ceiling height at all corners and near the proposed cabinets. A sloping ceiling or beam changes overhead-cabinet height.
- Measure each door and note its frame width, opening direction and swing area. Include the flat’s entrance door if it affects appliance delivery.
- Measure every window: width, height, sill level, frame depth and distance from the nearest corner.
- Mark service shafts, inspection openings, gas lines, water inlets, waste pipes and the sink-trap position. Keep access panels where connections need maintenance.
- Plot electrical points, switchboards, exhaust openings and appliance outlets, including their height from the finished floor.
- Photograph irregular corners, columns, beams and wall offsets; note which dimensions cannot be altered.
| Measurement | Record | Design consequence |
|---|---|---|
| Wall and corner | Length, angle, offset | Sets cabinet widths and filler pieces |
| Plumbing and shaft | Centre line and access area | Fixes sink position and service panels |
| Electrical points | Location and height | Positions appliances and backsplash outlets |
| Door and window | Opening, sill and swing | Prevents blocked circulation and collisions |
Which kitchen layout and clearances fit your room and cooking routine?
Choose the layout by tracking movement between preparation, cooking, cleaning, storage and refrigerator access, not by cabinet appearance alone.
| Layout | Room and users | Cooking pattern | Main caution |
|---|---|---|---|
| Straight-line kitchen | Narrow wall or open-plan room; one user | Light or occasional cooking | Keep sink, hob and refrigerator close without placing the hob directly beside the wall |
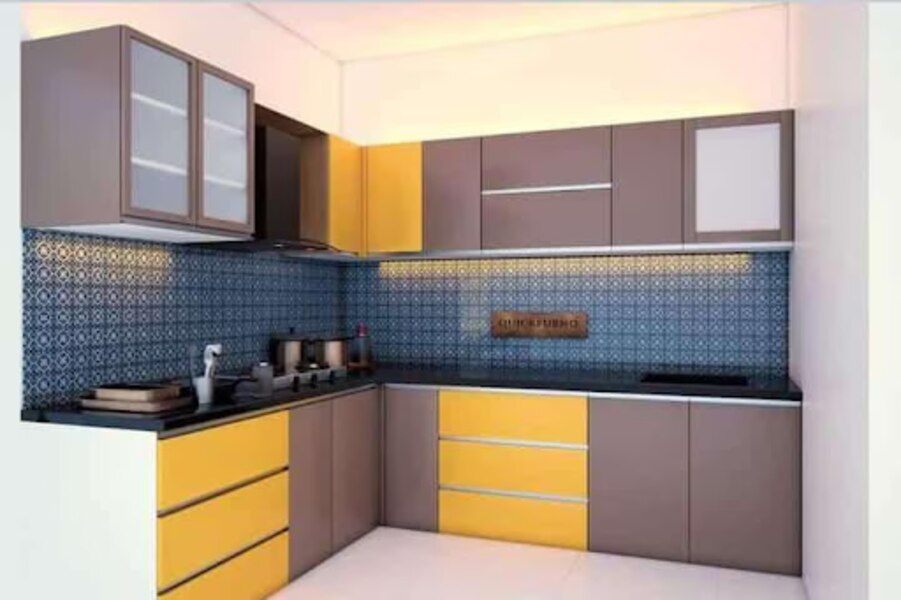
| L-shaped kitchen | Small-to-medium room; one or two users | Regular cooking with separate preparation and cooking zones | Protect the corner from dead storage and keep the main walkway outside the work area |
| Parallel kitchen | Long room with two opposing counters; one user, or two only with care | Frequent cooking and substantial storage | Maintain a wide aisle; open appliance doors can block the opposite counter |
| U-shaped kitchen | Broad room with three usable walls; one or two users | Frequent, multi-dish cooking | Avoid enclosing the room so tightly that entry, refrigerator access or drawer opening becomes awkward |
Set the work surface at 34–36 inches (864–914 mm). Leave 42 inches (1,067 mm) between counters or an island for one cook and 48 inches (1,219 mm) for two; include every oven, dishwasher and refrigerator door swing.
- Keep about 12 inches (300 mm) of landing space beside the cooktop, with heat-safe clearance from walls and tall units.
- Leave 15 inches (380 mm) beside the refrigerator on its opening side for unloading groceries.
- Check that open drawers, pull-outs and appliance doors leave a clear circulation path of about 36 inches (914 mm), or 42–48 inches in a working aisle.
- Provide removable backs or access panels at sink traps, filters, water purifiers and waste connections; fixed cabinets can turn a small leak into demolition.
How should each kitchen module support the way you work?
Place modules by movement, not by cabinet symmetry: refrigerator access, preparation, cooking, cleaning and storage should connect in the order you use them. This zoning works better than forcing every kitchen into a traditional work triangle, especially when appliances or an open-plan room interrupt the three points.
- Put the sink cabinet in the cleaning zone, with a clear stretch of counter beside it for rinsing and preparation. Keep the trap, waste pipe, water purifier and filter reachable through a removable back or access panel.
- Keep the hob and chimney zone away from the sink’s splash area, with landing space on both sides for hot pans and ingredients. Do not let a tall cabinet or refrigerator door collide with the hob user.
- Install cutlery drawers directly below or beside the preparation counter, not across the room. Store frequently used knives and tools between the preparation and cooking zones.
- Use corner storage for pans, mixers or less frequently used cookware; choose pull-out trays or rotating hardware that lets you reach the rear without emptying the cabinet.
- Place a tall pantry near the refrigerator or preparation zone. Specify shelf, hinge and wall-fixing load ratings for the provisions it will carry.
- Add an appliance garage near sockets and the preparation counter, with ventilation for heat-producing appliances.
- Position the waste-bin pull-out between the sink cabinet and preparation area, but away from stored food.
- Use overhead cabinets for light, occasional-use items, leaving chimney clearance and door-opening space.
Check every drawer, refrigerator door and appliance door together. Fixed backs that conceal leaks can turn a blocked pipe into a cabinet-removal job.
Which materials and construction details matter more than a glossy finish?
Choose cabinet material by exposure and load, not shine: glossy acrylic cannot prevent a swollen sink carcass or weak hardware. Plywood is usually safer than MDF or particle board for wet, heavily used cabinets, but its IS 303 classification and sealed edges matter; “BWP” resists boiling-water testing, not leaks or standing water.
| Material | Best use | Main check |
|---|---|---|
| Plywood | Carcasses and drawers | Grade, thickness, sealed cut edges |
| MDF | Painted or routed shutters | Keep it away from wet zones |
| Particle board | Dry, budget modules | Reject swollen or unsupported panels |
| Laminate shutters | Hard-wearing doors | Inspect edge-banding and joints |
| Acrylic | Glossy shutters | Check scratch resistance and alignment |
| Membrane | Routed profiles | Check peeling near heat and moisture |
| Glass | Easy-clean shutters | Verify toughened glass and secure channels |
| Granite | Countertops | Confirm support and sealed sink cut-out |
| Quartz | Uniform, low-maintenance tops | Protect joints from heat and impact |
| Steel | Moisture- or termite-prone carcasses | Specify grade and coating, not “metal” |
Near the hob, use heat-resistant finishes and maintain the manufacturer’s clearance; membrane edges and some adhesives can lift. Near the sink, seal every drilled edge, support the countertop continuously, and repair leaks immediately. Stainless steel 304, containing about 18% chromium and 8% nickel, resists corrosion better than many 200-series grades.
Powder coating or galvanising still needs coverage over cut edges, drainage and dry joints.
- Ask for the stated shelf and drawer load capacity, not a visual thickness.
- Test soft-close runners, hinges, adjustment range and cycle quality.
- Check CNC drawings for board thickness, edge banding, tool radius and hardware clearance.
- Reject trapped moisture behind panels; scratches and cut joints can rust steel.
Should you choose factory-made modular furniture or site-built carpentry?
Choose factory-made modular units when installation time, repeatable dimensions and clean replacement matter most. Choose site-built carpentry when walls are irregular, filler-space control requires extensive on-site adjustment, or you expect frequent field changes. Neither method is automatically easier to repair: glued carcasses and concealed services can make a simple leak a cabinet-removal job.
| Option | Best fit | Main compromise |
|---|---|---|
| Factory-made modular units | Fast installation, CNC fabrication, documented parts and easier replacement | Requires accurate site measurements, fillers and scribes for uneven walls |
| Site-built carpentry | Unusual corners, tight filler control and on-site modification | Longer installation, variable accuracy and harder component replacement |
| Steel and wooden furniture | Steel for moisture or termite exposure; wood-based panels for warmer finishes and simpler alteration | Steel needs corrosion protection and may transmit noise; panels need sealed edges |
Before approving either method, ask for:
- A CNC drawing showing carcass dimensions, filler widths, scribes, drilling patterns, appliance clearances and service voids.
- Removable backs or access panels beside sink traps, filters, water purifiers, waste pipes and appliance connections.
- The wall-fixing method, fixing locations and substrate checks; do not rely on adhesive alone.
- Independent island anchoring, floor-level adjustment and support for a stone or sintered countertop and its overhang.
- Replaceable fronts, hinges, drawer boxes and panels, plus a documented route for future plumbing or electrical changes.
When evaluating Shree Ganesh Steel and Wooden Furniture, use these drawings and service details to compare the proposal; the name cannot replace measurable specifications.
Frequently asked questions
What should you measure in a Pimple Saudagar flat before designing the kitchen?
Measure the finished floor and tiled walls, ceiling height, windows, doors, service shafts, plumbing points, electrical outlets, gas lines and appliance locations. Record wall deviations and skirting depth so cabinets do not collide with fixed elements.
Which kitchen layout and clearances fit your room and cooking routine?
Choose a straight, L-shaped, parallel or U-shaped layout according to room width, door swings and workflow. Leave at least 900 millimetres between opposing counters, and provide more space where two people cook together or appliance doors open into the aisle.
How should each kitchen module support the way you work?
Place the sink near plumbing, keep preparation space beside it, position the hob away from corners, and store frequently used items between knee and shoulder height. Use drawers for cookware, pull-outs for narrow gaps and corner mechanisms only when their access justifies the lost storage.
Which materials and construction details matter more than a glossy finish?
Compare core material, thickness, moisture resistance, edge banding, back panels, hinges, drawer runners, adjustable legs and wall fixing. Sealed edges, reliable hardware and serviceable components matter more than surface gloss in a kitchen exposed to steam, spills and heat.
Should you choose factory-made modular furniture or site-built carpentry?
Choose factory-made modular units for repeatable dimensions, quicker installation and replaceable components. Choose site-built carpentry when walls are irregular, storage requires unusual dimensions or the design depends on extensive on-site adaptation. Compare measurement accuracy, installation quality, material specifications and future repairs.